One thing has remained consistent in my years as a cell phone user: I’ve never been happy with how wireless carriers charge for cell phone plans. Specifically I do not like the fixed price for service, two year contracts, high overage charges, increasing data costs, and the lack of shared data plans. So last week when my contract expired for my Verizon smartphone, I decided to try an experiment: terminating my cell phone plan.
Now before you think I am converting my cash to precious metals and building a bunker in Maine, I should be clear: I’m not willing to give up the 24x7 connectedness that has permeated my life over the last few years. But I did want to convert to consumption based pricing, be able to use voice and data on my multiple devices, and pay once for only the services I value (and note: I do not value paying for multiple 3G plans and/or text messaging).
I know I may not be the typical cell phone customer. I am more likely to be having a phone conversation in Google Voice or a video chat in Skype on my MacBook than using a cell phone. I also am coming to terms with an unexpected side effect of my over-connectedness: I no longer value the quality/reliability of any single form of communication, since I am now connected in so many ways.
I’m only a week into the experiment, so the jury is still out as to whether this will be a sustainable solution over the long term. But so far, I’m on a path to about a $9 monthly cost for what is effectively unlimited voice, data and text messaging. For anyone interested in following along with my experiment, the steps to setup are below:
Step 1: Setup a Google Voice Phone Number
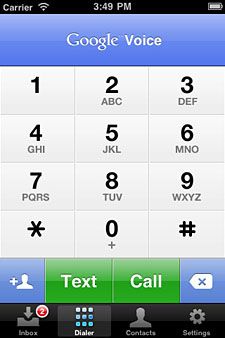
I’ve been a Google Voice subscriber for several years, driven initially by an unwillingness to pay for a text messaging plan. For the low price of $0 per month, you too can have a phone number in any area code in the U.S. that will ring through to any other phone or computer. Included for free is web-based access to your voicemails, automatic transcription to text, email notifications, unlimited text messaging, and support for making/receiving calls on your PC. The key feature upon which I rely in my carrier-less experiement though is to have a phone number.
Step 2: Install Google Voice on PC (optional)
For the last couple years, my primary “phone” has been my MacBook. With the Google Voice client and a comfortable headset, this has proven to be a flexible way to make and receive calls from the primary device I use each day. With the client, calls to your Google Voice number will automatically ring on your computer, and you can make local and long distance calls from your browser.
Step 3: Install Google Voice on Smartphone
Using the Google Voice app on my Android smartphone has caused no end of embarrassment with Verizon support over the years (I can never quite remember my other phone number). Setting it up is as simple as downloading Google Voice from the app store and configuring it to be the default dialer. The integration is a little cleaner on Android than iOS, but it is fortunately supported now by both platforms. With the app installed, you can seamlessly send and receive calls and texts on your smartphone using your Google Voice phone number.
Step 4: Install Google Voice VoIP App
Unfortunately Google Voice will still use the voice plan on your smartphone to send and receive calls. Since I terminated my cell phone plan, I no longer had a voice plan (oops!). Fortunately there is an app for that. I downloaded and installed the GrooVe IP app to allow me to send/receive Google Voice calls over a data network. There are several similar applications, so feel free to look around if GrooVe is not right for you. Even in you plan to continue with a voice plan, a VoIP app will allow you to reduce your voice minutes and/or be able to use your cell phone in areas with spotty cell coverage.
Step 5: Configure Smartphone Wireless
I configured my Android smartphone to automatically connect to the various wifi networks I use each day (home, work, Panera). This means that due to #3 and #4 above, wherever I am in range of a known wifi device, I can send and receive calls on my smartphone using my Google Voice number, even though I do not have a voice or data plan with a wireless carrier. Using VoIP will usually result in a degradation in call quality, but so far this has been acceptable for my uses.
Step 6: 4G Hotspot for the Dead Zones (optional)
But what about those rare times I do not have access to an open wifi network (e.g. Fenway Park)? My solution is a lesser known wireless provider called Ting. Ting is what I hope Verizon and AT&T will be when they decide to join the 21st century. They offer consumption based pricing for voice, text and data plans with no contracts, no overage charges, support for multiple devices on a single plan, and pay for only what you use. Okay, there is one thing not to love:the Sprint network. But for my metro Boston living, the Sprint coverage has been fine.
I ordered a 4G hotspot from Ting, which I use for voice and data when I do not have access to open wifi. In a month in which I do not use my hotspot, I will get charged a $6 device fee. If I use less than 100MB (~20 minutes of voice), I will get charged $9 ($6 device fee + $3 data fee); for less than 500MB, it will cost me $19 ($6 device fee + $13 data fee). The downside of carrying the extra device is mitigated by the upside of having wireless connectivity for all my devices, wherever I go.
Conclusion
I know my solution is not for everyone. In fact it’s going to take me a few months to make sure it is right for me. But I am convinced this solution is closer to what we will be consuming from our providers a few years down the road - either from the current carriers if they adapt, or from companies like Google and Ting if they do not. So in the meantime, I am casting my vote against current mobile carriers with the 2012 equivalent of “turn on, tune in and drop out”.
No cell phones were hurt in the making of this blog post.
Related Posts: 6 Steps to Cutting the Cable Cord